
Dropbox is one of the most popular cloud storage options available, although the company has found itself in the spotlight recently, with Edward Snowden urging people to stop using the service for its lack of security.
It is possible to encrypt Dropbox using third party tools, which will be the focus of this guide.
Encryption is a hot topic at the moment, with the FBI asking Apple to break its own security, and a man being jailed for not decrypting data when called upon by the police. Terrorism and child-abuse are so often cited by government agencies as reasons to destroy strong encryption, but encryption is the backbone of internet security. Think about all the institutions and individuals that need to keep private data secure. Banks and financial institutions, schools, accountants, online shops, to name but a few. Without encryption, these organisations are under constant threat of data breaches that could cost millions and put people in danger.
Government officials seek back doors to encrypted data, saying they will use the power for good, but they repeatedly prove themselves irresponsible or even to be acting illegally with private data.
Nothing to hide, nothing to encrypt, right? This is the mantra repeated even by intelligent people I know. But it fails to address the fact that by weakening encryption, like many governments want to do, we open a door to hackers who want to get inside our accounts and steal everything.
Is Dropbox Secure?
In its natural state, Dropbox isn’t very secure.
They do encrypt files during transfer AND at rest, and offer 2-step verification, but the fact that they hold the encryption keys means they can open any of your files without you knowing. It also creates the risk that, if hackers compromise Dropbox’s servers, they may also get access to everyone’s data.
But this is highly unlikely to happen, right? Well, yes and no. Dropbox do use secure encryption to store your files, so that’s good, but as we saw last year with Ashley Madison, attacks do happen, and people’s data can be stolen.
Encryption is a mammoth subject and not one that’s easy to explain, for a detailed look at backup encryption, check the security section in or Ultimate Guide, or this explanation from BestVPN. For the sake of this guide, I will cover the basic options offered by most backup providers.
Encrypted in Transit/ at Rest
This is the most basic level of security, offered by practically all backup and cloud storage providers, apart from some – *Cough*, Google Drive – that only encrypt during transit. Data is encrypted by the company when it’s travelling from your computer to their servers, and while it’s at rest on their servers. This has the benefit of being easy and convenient for users but means the provider can, at any time, view, modify, copy or potentially hand over to the authorities if subpoenaed. It also leaves the potential for hackers to compromise the system used by the provider, and gain access to all the information stored on the servers.
This is the method Dropbox uses, which was pointed out by Edward Snowden as being anti-privacy.
So what other options are available?
End-to-End Encryption
One way to secure your data against this possibility is to choose a provider that offers end-to-end encryption. This means that the data is encrypted at the point of upload and the user chooses the password, and then transferred to the backup servers and stored there fully encrypted. The possible downside of this is that, because most backup providers use proprietary software, they could, in theory, create a backdoor within the encryption client itself, and there is also the possibility that the provider has access to the encryption key.
It also raises the issue that, if the password is input in plaintext, it may be at risk of being hijacked by cyber-criminals.
Zero Knowledge Backups
The solution? Zero knowledge! This is a feature of some backup providers that promise never to store your encryption key on their servers, and provide encryption software for the user’s computer so they can encrypt everything prior to backing up. This means the backup provider simply can’t view or modify any of the backed up files.
Unfortunately, not a lot of providers offer this. SpiderOak is one of the most well known zero-knowledge backup providers and even comes with a recommendation from Edward Snowden himself. They are a good option for those who want high security on everything they back up but are slower than many other options and don’t have the handy interface that allows for instant access to files.
So what if you’re happy with Dropbox, but want to secure your files?
It’s easier than you might think.
Encrypt Your Files with VeraCrypt
The easiest way to get started with VeraCrypt, and most useful in conjunction with Dropbox, is to create a container that will store the encrypted data.
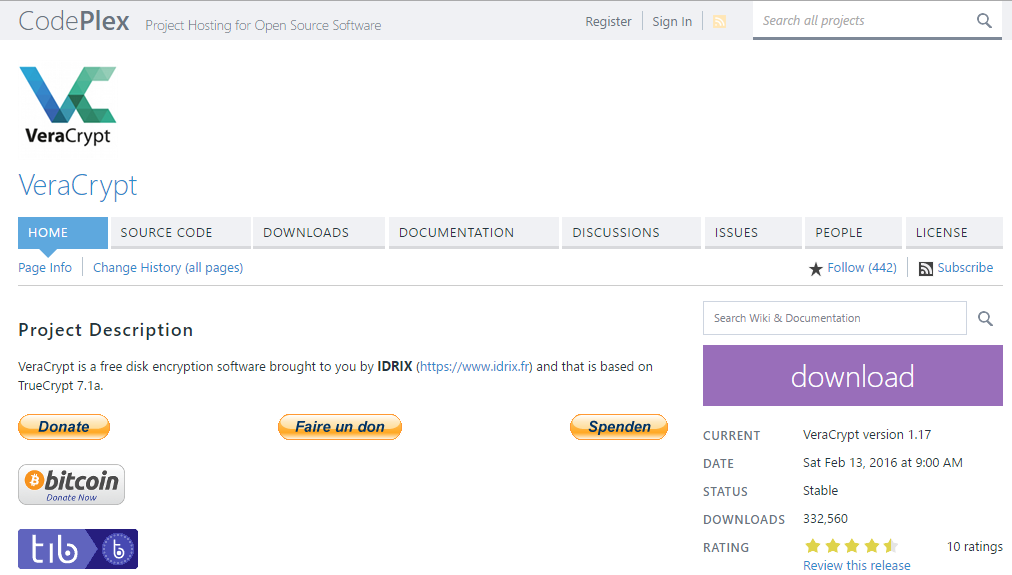
Head over to the veracrypt.codeplex.com/ and download the free software. Installation is easy, just follow the instructions.
Creating an Encrypted Volume in VeraCrypt
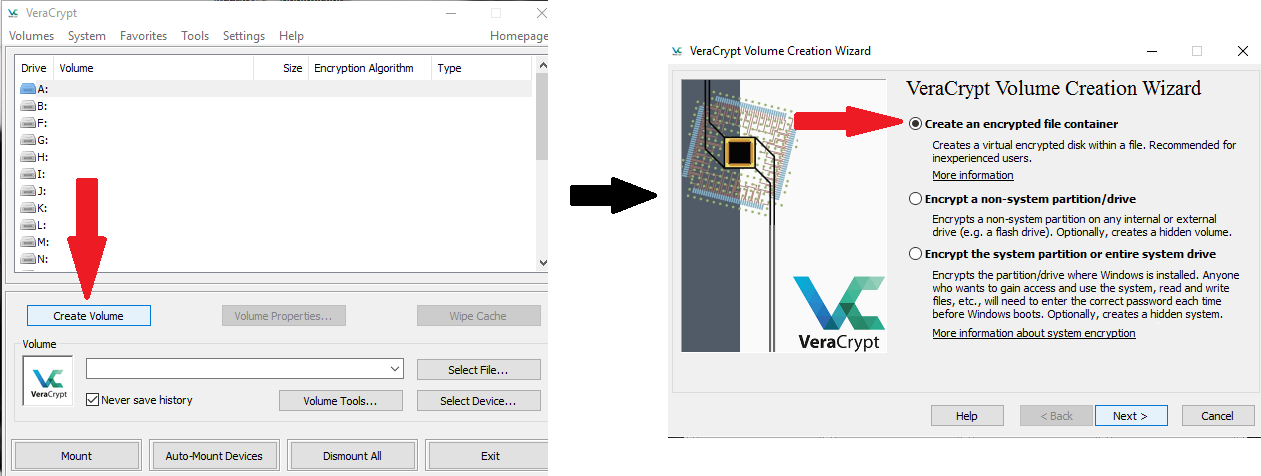
1. Open VeraCrypt and choose the option to “Create Volume”. On the next screen, choose “Create an encrypted file container”, and click Next.
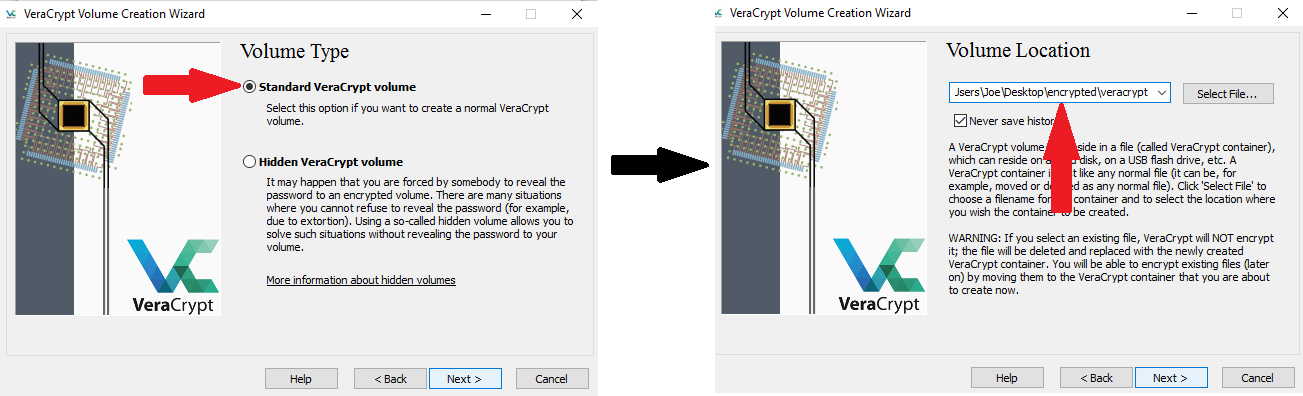
2. Next you’ll need to specify whether you want to create a standard VeraCrypt volume or a hidden one. A standard volume offers excellent protection, and should be enough for just about anyone, but if someone wants that data and has ways of making you talk, they may get your password out of you and be able to decrypt all your data. The hidden volume feature is pretty interesting. It requires you to already have a standard volume, into which it places another volume that is hidden from the outside, and has a separate password to the standard. To any outsider, it looks like just a standard volume as the free space is filled with nonsense code (similar to what encrypted data looks like) – therefore, there’s nothing to indicate that there’s actually another folder buried within.
3. Choose a volume location by copying the location where you want to keep the encrypted file, and appending it with: \name here “name” is whatever you want to call your encrypted file. As you can see below, I created a folder on my desktop called “encrypted” and
In this case, “name” is whatever you want to call your encrypted file. For the sake of this demonstration, I created a folder on my desktop called “encrypted” and called my file \veracrypt, as you can see below. For Dropbox, the process is exactly the same but you just specify a filepath to you Dropbox folder.
4. On the next screen, you will be prompted to choose an encryption algorithm and a hash algorithm. AES 256/ SHA-512 is generally considered secure, although being certified by NIST might put some people off – If you’re one of them, take a look at Twofish. Click next, then choose how big you want your container to be. You will be able to move files into that container to be encrypted, so make sure it fits your requirements.

5. Now choose a password, and make it a good one! I highly recommend Keepass, which is a free and open source password manager, and will generate a complex and highly secure password (you also need a password to access your keepass file, and you need to be able to remember it. For a secure yet memorable password creation system, try diceware ).
6. After you’ve chosen a password you’ll need to format your volume (I’ve kept it as FAT for ease of use. You will be asked to move your mouse as randomly as possible within the window. This increases the cryptographic strength of the encryption key by adding data based on your random mouse movements, rather than an algorithm.
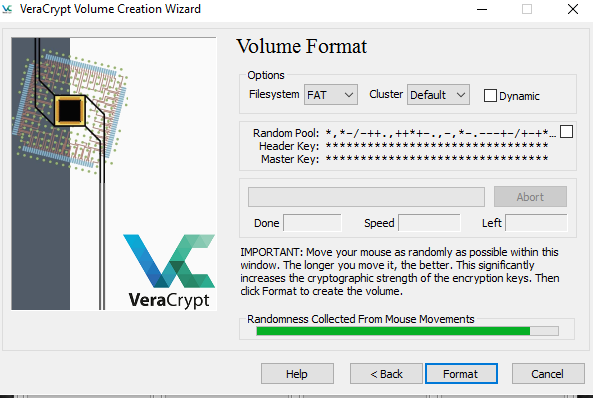
When that’s done, your encrypted volume is ready to use! It can be mounted and used like any regular volume, and can be dragged, dropped, and deleted just like a normal file.
Mounting Your Encrypted Volume
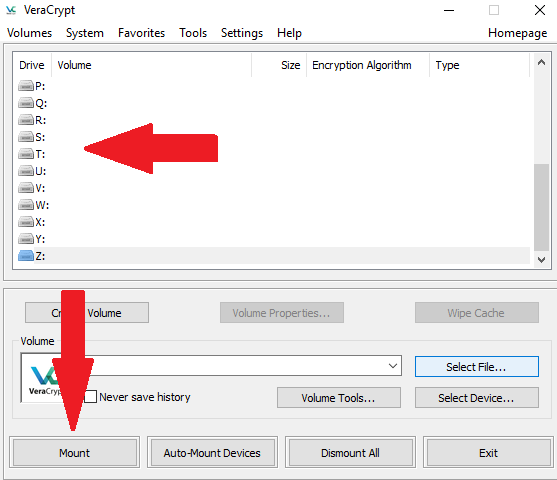
To use your new encrypted volume, you need to mount it.
Go back to the first VeraCrypt screen, and click “Select file”, then navigate to where your encrypted volume is stored. Open it and you’ll be taken back to the first screen, where you should choose a drive letter that you’re not already using, and click “mount”. A password box will appear, enter your password and hit “OK”.
Now you’ll be able to go to This PC and open the folder as you would any other. you can drag and drop things into it, delete things, open them in their unencrypted state, move the folder, etc. To encrypt the folder and everything in it, just go back to Veracrypt and hit “Dismount”.
Encrypting Dropbox – Final Thoughts
The fact that Dropbox works so well in conjunction with VeraCrypt goes a long way to reassuring me that it is, in fact, a potentially secure storage option. It offers some of the best functionality when it comes to storing encrypted backups, as you can specify a Dropbox location as your volume location then mount it straight from dropbox, no need to download it first.
Plenty of backup other providers support encrypted files, although if you want to change anything within them, many will force you to download the VeraCrypt volume, mount it as a local volume, do your editing, then re-upload, to the backup servers.
Whether you’re a Dropbox user or not, however, VeraCrypt is an excellent way to ensure that you can keep using your preferred backup provider without compromising on data security. So if you’ve got personal files that you want to keep private, but don’t fancy struggling with tricky software or slow uploads, it could be the perfect solution.