Our main “raison d’etre” here at BestBackups is to review online backup services, however, I’m strongly of the belief that local backups are still an important part of protecting your valuable data. They’re also cheap and easy to set up, as I’m going to explain now.
As you’ll see from my backup plans guide, the most sensible way to back up your computer(s) is to implement a 3-2-1 backup system to ensure you have multiple restoration options if the worst happens. The simplest way to do this is to use an online backup service like CrashPlan, AND perform regular local backups to an external hard drive or NAS (Network Attached Storage) device.
Local Backups and External Hard Drives
External hard drives make local backups simple and economical – all you have to do is remember to actually plug them in and run a backup on a regular basis!

On the most simplistic level, you can perform local backups by copy and pasting the files you want to keep safe over to an external hard drive. This is the same way that you would copy documents to a USB key for transportation.
However, this method quickly becomes a hassle for regular backups, typically ending up with you storing multiple backups of the same files, or in uncertainty when you come to overwrite an older backup.
Thankfully there’s a far better way, with both Microsoft Windows and Apple OS X coming with backup and restore functionality built in.
We’ll move on to how that functionality works on the two platforms in a moment, but first I should emphasise that, by default, these systems will back up everything on your computer. While it’s possible to exclude files and folders to be more specific about what you want included in your backups, I’d be inclined to encourage you to back up everything.
Why is this? Because there’s often data tucked away all over your computer’s filesystem that you could miss – and because external hard drives for local backups are really inexpensive. At the time of writing you can buy 1TB of external storage for around $60 – so you really might as well back up everything.
Local Backups for Mac: Time Machine
Apple users have the very user-friendly Time Machine software built into OS X for local backups. Despite being incredibly simple to set up (it even walks you through it when you first plug in an external hard drive), Time Machine is surprisingly sophisticated. It automatically keeps hourly snapshots and daily and weekly backups of your whole system while an external drive is connected. It will also prompt you to plug in and backup regularly if you prefer to keep your Mac and backup device separate.

Furthermore, Time Machine local backups are very simple and intuitive to restore – whether you need to retrieve an individual file, or even restore your entire system to new hardware.
Unless you’re a real technophobe, you probably won’t need any help setting up Time Machine backups on a Mac. However, you’ll find detailed instructions from Apple here if you require further information.
Local Backups for Windows: Backup and Restore
Since Windows 7, Microsoft has included user-friendly backup and restore functionality with the Windows operating system. Now, with the release of Windows 10 this functionality has evolved with the release of a “File History” feature which, dare we say, works a little more like Time Machine for local backups.
None of it’s quite as user-friendly as the Apple approach, but it’s still very easy to set up local backups with this inbuilt functionality.

The exact functionality available to you will depend on your Windows version. You’ll find handy guides here for Windows 7 and here for Windows 10.
Local Backups with Network Attached Storage (NAS)
Using a network attached storage (NAS) device for local backups is better suited to those of a more technical persuasion, but can prove really useful – especially if you want to back up multiple computers on a home network.
NAS devices are stand-alone devices containing one or more hard drives, and connect directly to your home network via an Ethernet cable or a Wi-Fi connection. Instead of backing up to an external drive, you send the backup across your network to this device.
Some NAS devices come with proprietary software, or you can also use the in-built software for Mac and Windows described above. (It is, however, important to note that some “Home” versions of Windows do not natively support NAS backup).

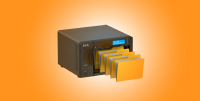
One of the most well-known NAS devices on the market is the AirPort Time Capsule from Apple, pictured above. This is specifically for Macs – but there are plenty of options out there for other operating systems too.
Remember: Local backups are just part of the picture
Getting your local backups sorted is a very important part of getting an effective regime in place for protecting your data, but it’s only part of the story.
If you’re going to abide by the recommended “3-2-1” backup strategy, there should be another copy of your files somewhere, and that’s where online backup comes in.
If you think this sounds like overkill, then just consider this: if you keep your backup drive next to your computer, it could burn in the same fire as your computer, flood in the same flood, or be stolen in the same burglary! The same could happen to a NAS device – so you really need an offsite backup too.
With that in mind, I’ll point you in the direction of the following articles:
- Our guide to the best backups for Mac Time Machine Users.
- Our guide to the best backups for Windows.
- Our Ultimate Backup guide – for all you could ever wish to know about local backups, online backups, and protecting your data.
IMAGE CREDIT: Wikipedia