
There are three main things to take into consideration when it comes to USB disk security: adding secure authentication, protecting your data from any unwelcome, prying eyes, and ensuring that your files stay virus-free.

Fortunately, you can solve all of those problems using three simple solutions – password protection, encryption, and antivirus software. So here’s our guide to choosing, using and managing all three to make sure that the contents of your external drive stay safe no matter what.
USB Password Protection
Protecting your USB disk files with a password is an excellent way to ensure that, should the device be lost or stolen, no-one will be able to access the data stored on it. There are several ways to password protect files backed up to a USB drive – either by setting a password for the device as a whole or by protecting the documents individually.
Password protect files using Microsoft Word
The simplest way to secure individual documents, this method is quick, free, and easy to achieve for all MS Office users. The following process is for Office 365, or you can find guides to using earlier versions elsewhere online.
- While your chosen document is open, click ‘File’
- When the Info page opens, select ‘Protect Document’

- From the dropdown menu, select ‘Encrypt With Password’

- Enter your chosen password in the box that pops up.
- Enter the password again to confirm.
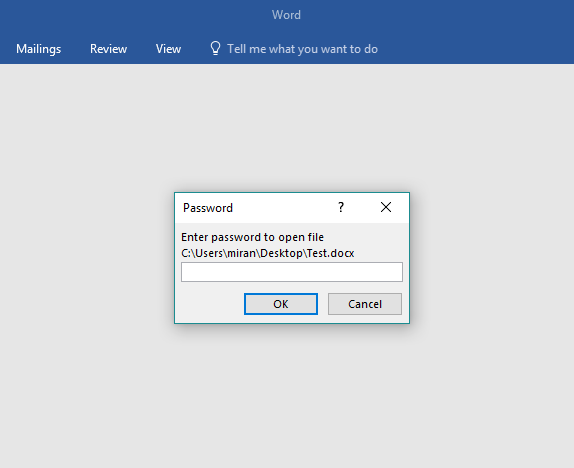
- Congratulations! Your document can now only be accessed after the correct password has been entered.
Once this is done, all you need to do is copy and paste the documents onto your USB drive as normal – the password protection will remain. Sorted!
Password protect your USB device using USB Safeguard
USB Safeguard is a simple password protection program that runs on your USB drive itself – traveling with your device wherever it goes. Compatible with use on Windows, Mac and Linux devices, it automatically locks your drive every time you unplug it, or after a period of inactivity – though be warned that there’s no password reset function, so you’ll need to make sure that you keep this one safe!
There’s a free version of USB Safeguard available, although it can only be used on drives up to 2GB in size, as well as a free trial of the full program, which will set you back 19 Euros for a single license (around $21, based on the exchange rate at the time of writing). This license won’t expire (although you’ll need to activate it within a year of purchase), and can still be used after formatting your drive. Here’s how to use it:
- Download the software from the USB Safeguard website.

- Insert your USB drive in order to install the program.
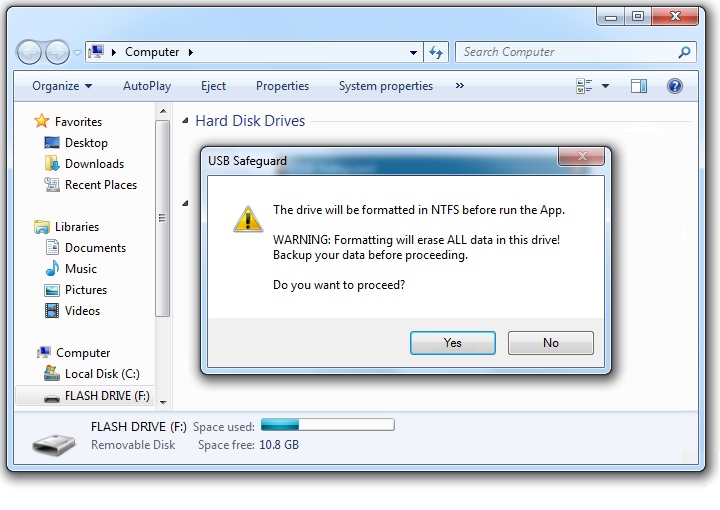
- During setup, you’ll receive a message telling you to format the drive in NTFS before use. Click yes to proceed – though make sure that you’ve already saved any data already on the device elsewhere, as this will process will wipe it all.
- Once setup is complete, start the app and accept the license agreement. You’ll then be prompted to enter a password.
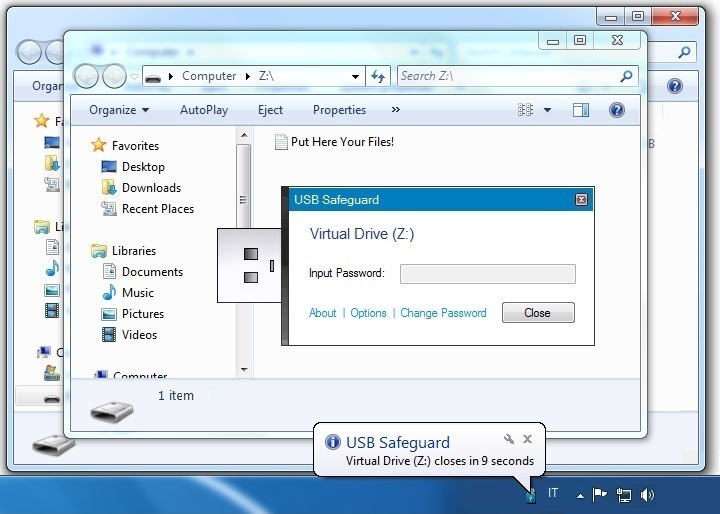
- After this is done, you’ll need to input the password again to gain access to your USB drive. You can then add, remove and edit files exactly as normal.
- Close the program and safely remove your USB device to finish.
NOTE: The protection that these methods provide for your files is only as strong as the passwords you use. So rather than opting for an obvious word or phrase that only takes a few seconds to think up, spend a little time coming up with a strong password. Including a combination of numbers, symbols, lowercase and capital letters, and making sure that it’s more than eight characters long is a good place to start, or here are some other ways to avoid creating passwords that can be easily broken.
USB Encryption
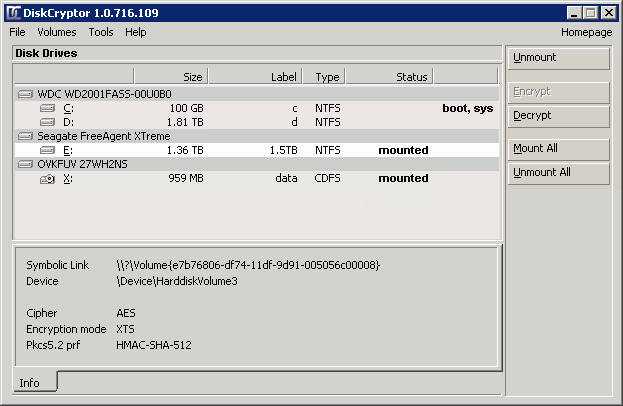
Encrypting your USB drive is a highly effective way to keep your files secure – offering the most extensive protection of the options discussed here, although it is a little more time consuming. There are several tools that can be used to encrypt files on your PC, but one of the best for use with USB drives is the opensource freeware, DiskCryptor. Follow the instructions below to set it up:
- Download and install DiskCryptor

- Make sure that your USB device is plugged in, and select it from the list of Disk Drives that pops up during setup
- The next step will require you to select an encryption algorithm. We’d recommend using AES.
- When prompted, enter a secure password to protect the device

- At this point, you will also have the option to use keyfiles. These complex, randomly generated codes add an extra layer to the authentication process, as both your password and your keyfile will be required to access the device, making it much harder for a hacker to gain entry using brute force. Create a keyfile by clicking ‘Generate Keyfile’ and saving the file to a secure location. It will then appear on the list of Keyfiles, after which you can click OK.
- The encryption process will then begin. Please note that this may take a while if you have a large capacity USB device, and if it already contains data.
- Once the process is finished, the DiskCryptor dashboard will display your USB drive as mounted. While in this state, you can add and remove files from the device
- To make your USB drive inaccessible again, select it from the dashboard and click ‘Unmount’. You may be asked if you want to format the drive at this point – select No, as unmounting will wipe the contents of the device.
- Finally, when you want to access the contents of your USB disk again, simply plug it in, open DiskCryptor, and select it from the Disk Drive list. Then click ‘Mount’, and enter your password and keyfile if you set one.
- Repeat as required!
NOTE: If you’ve already got files on your drive, setting up DiskCryptor won’t delete them unless you format the device – although we’d recommend making an extra copy just to be on the safe side.
Pre-encrypted USB drives
If this sounds like too much work, then never fear – you can buy USB drives with their own encryption included. They’re a little pricier than their encryption-free alternatives, but still won’t break the bank – with an 8GB Kingston drive with 256-bit AES encryption setting you back $30.99, and other similarly encrypted models starting from just $5.
Alternatively, if you’re serious about security, you may want to select a USB device that offers hardware (rather than software)-based encryption – as this eliminates the risk of inadvertently handing over your password details to a disreputable company. Prices on Newegg are similar to those using software-based encryption, with most devices ranging from $5 to $40.
BitLocker
BitLocker is Microsoft’s own encryption tool, which can be used to protect data volumes within Windows OS. Offering both encryption and password protection, it’s a good tool for safeguarding any storage device, which you’ll find recommended in many USB disk security guides elsewhere online.
While the tool itself has plenty to offer we’d like to give a word of warning, as it’s not always clear that BitLocker in fact has a very limited range of use. This is because you’ll need to be running a Pro version of Windows in order to make use of it – an upgrade which will cost Home users a hefty $199.99. If you’re already upgraded, however, it’s a great way to combine multiple USB security features in one program. You can find a great guide on how to set it up over at How-To Geek.
USB Disk Virus Protection
Storing infected files on a USB disk can be pretty disastrous,as, not only will the documents themselves be corrupted, but plugging the drive into another PC can transfer the virus in a matter of seconds. So if you’re using a USB disk to transfer data, it’s worth taking steps to protect yourself – just in case.
USB virus protection software doesn’t run on the device itself – instead, you’ll need to install it on your laptop, after which it will scan any USB drive as soon as it’s plugged in. Of course, in order to ensure that the files are not corrupted in the first place, it’s best to make sure that any device your USB drive is plugged into is using strong antivirus protection of its own – but if you’re moving data between home and work, friends and family etc. then it can be hard to guarantee the security of every computer you connect to. Which is exactly why it’s so important to take extra steps to enforce USB disk security from your own PC.
There are several antivirus providers that specialize in USB security, including USB Drive Antivirus and USB Disk Security – both of which are available to download for free. Here at BestBackups, we slightly favor USB Disk Security for its excellent reputation and ease of use. You can find a full walkthrough of how to install and use the software in this video from Free and Secure Softwares.
USB Disk Security Conclusion
The USB disk security measures detailed in this guide are a great way to put your mind at rest if you’re transferring personal or confidential files on a USB device on a regular basis. As with all things privacy-related, bigger is definitely better – so combining all three approaches is the best way to make sure that your data will stay safe no matter what.
Do you have any other suggestions or views on our recommendations? Leave us a comment and let us know!